Table of Contents
Arduino MKR ZERO

Arduino MKR ZERO (I2S bus & SD for sound, music & digital audio data)
A great description and general information about the SAMD21 one could find here: SpartkFun SAMD21 Overview
Installation
First one has to install the Arduino SAMD boards. In tools/boardmanager search and install the
Arduino SAMD Boards.
Secondly we need the specific Zero libraries. In sketch/library manager search and install the
Audiozero Library and the
SD Library (by Sparkfun).
Arduino SD library by Sparkfun
or
Arduino SD Library by Adafruit
On Arch Linux it needs more than one attempt to upload the code, the /dev/ttyACM0 can't be opened: No device found on ttyACM0!
Simple Audio Player
In open/libraries/ArduinZero one finds the SimpleAudioPlayerZero example.
These commands are needed:
 SD.begin(28);   //Initializes the SD library and card
 AudioZero.begin(2*44100);   //Initializes the DAC, 44100kHz stereo => 88200 sample rate
 File myFile = SD.open("test.wav");   // open the wave file
 AudioZero.play(myFile);   //plays the file
Simple audio player
The quality of the WAV file needs to be 44100kHz stereo and decoded with 8-bit unsigned PCM.
The audio signal is on pin DAC0/A0.
Some bugs are in the original code!
- one needs a short delay after Serial.begin
- the SD-card pin is 28
here is the fixed code:
SimpleAudioPlayerZero_Fixed
Unfortunately there is quite some bad humming after playing a file.
Serial
The MKR ZERO board need around half a second after initializing the serial port, so one has to pause the board before using any serial command.
Serial.begin(115200);
delay(500);
Pin Out
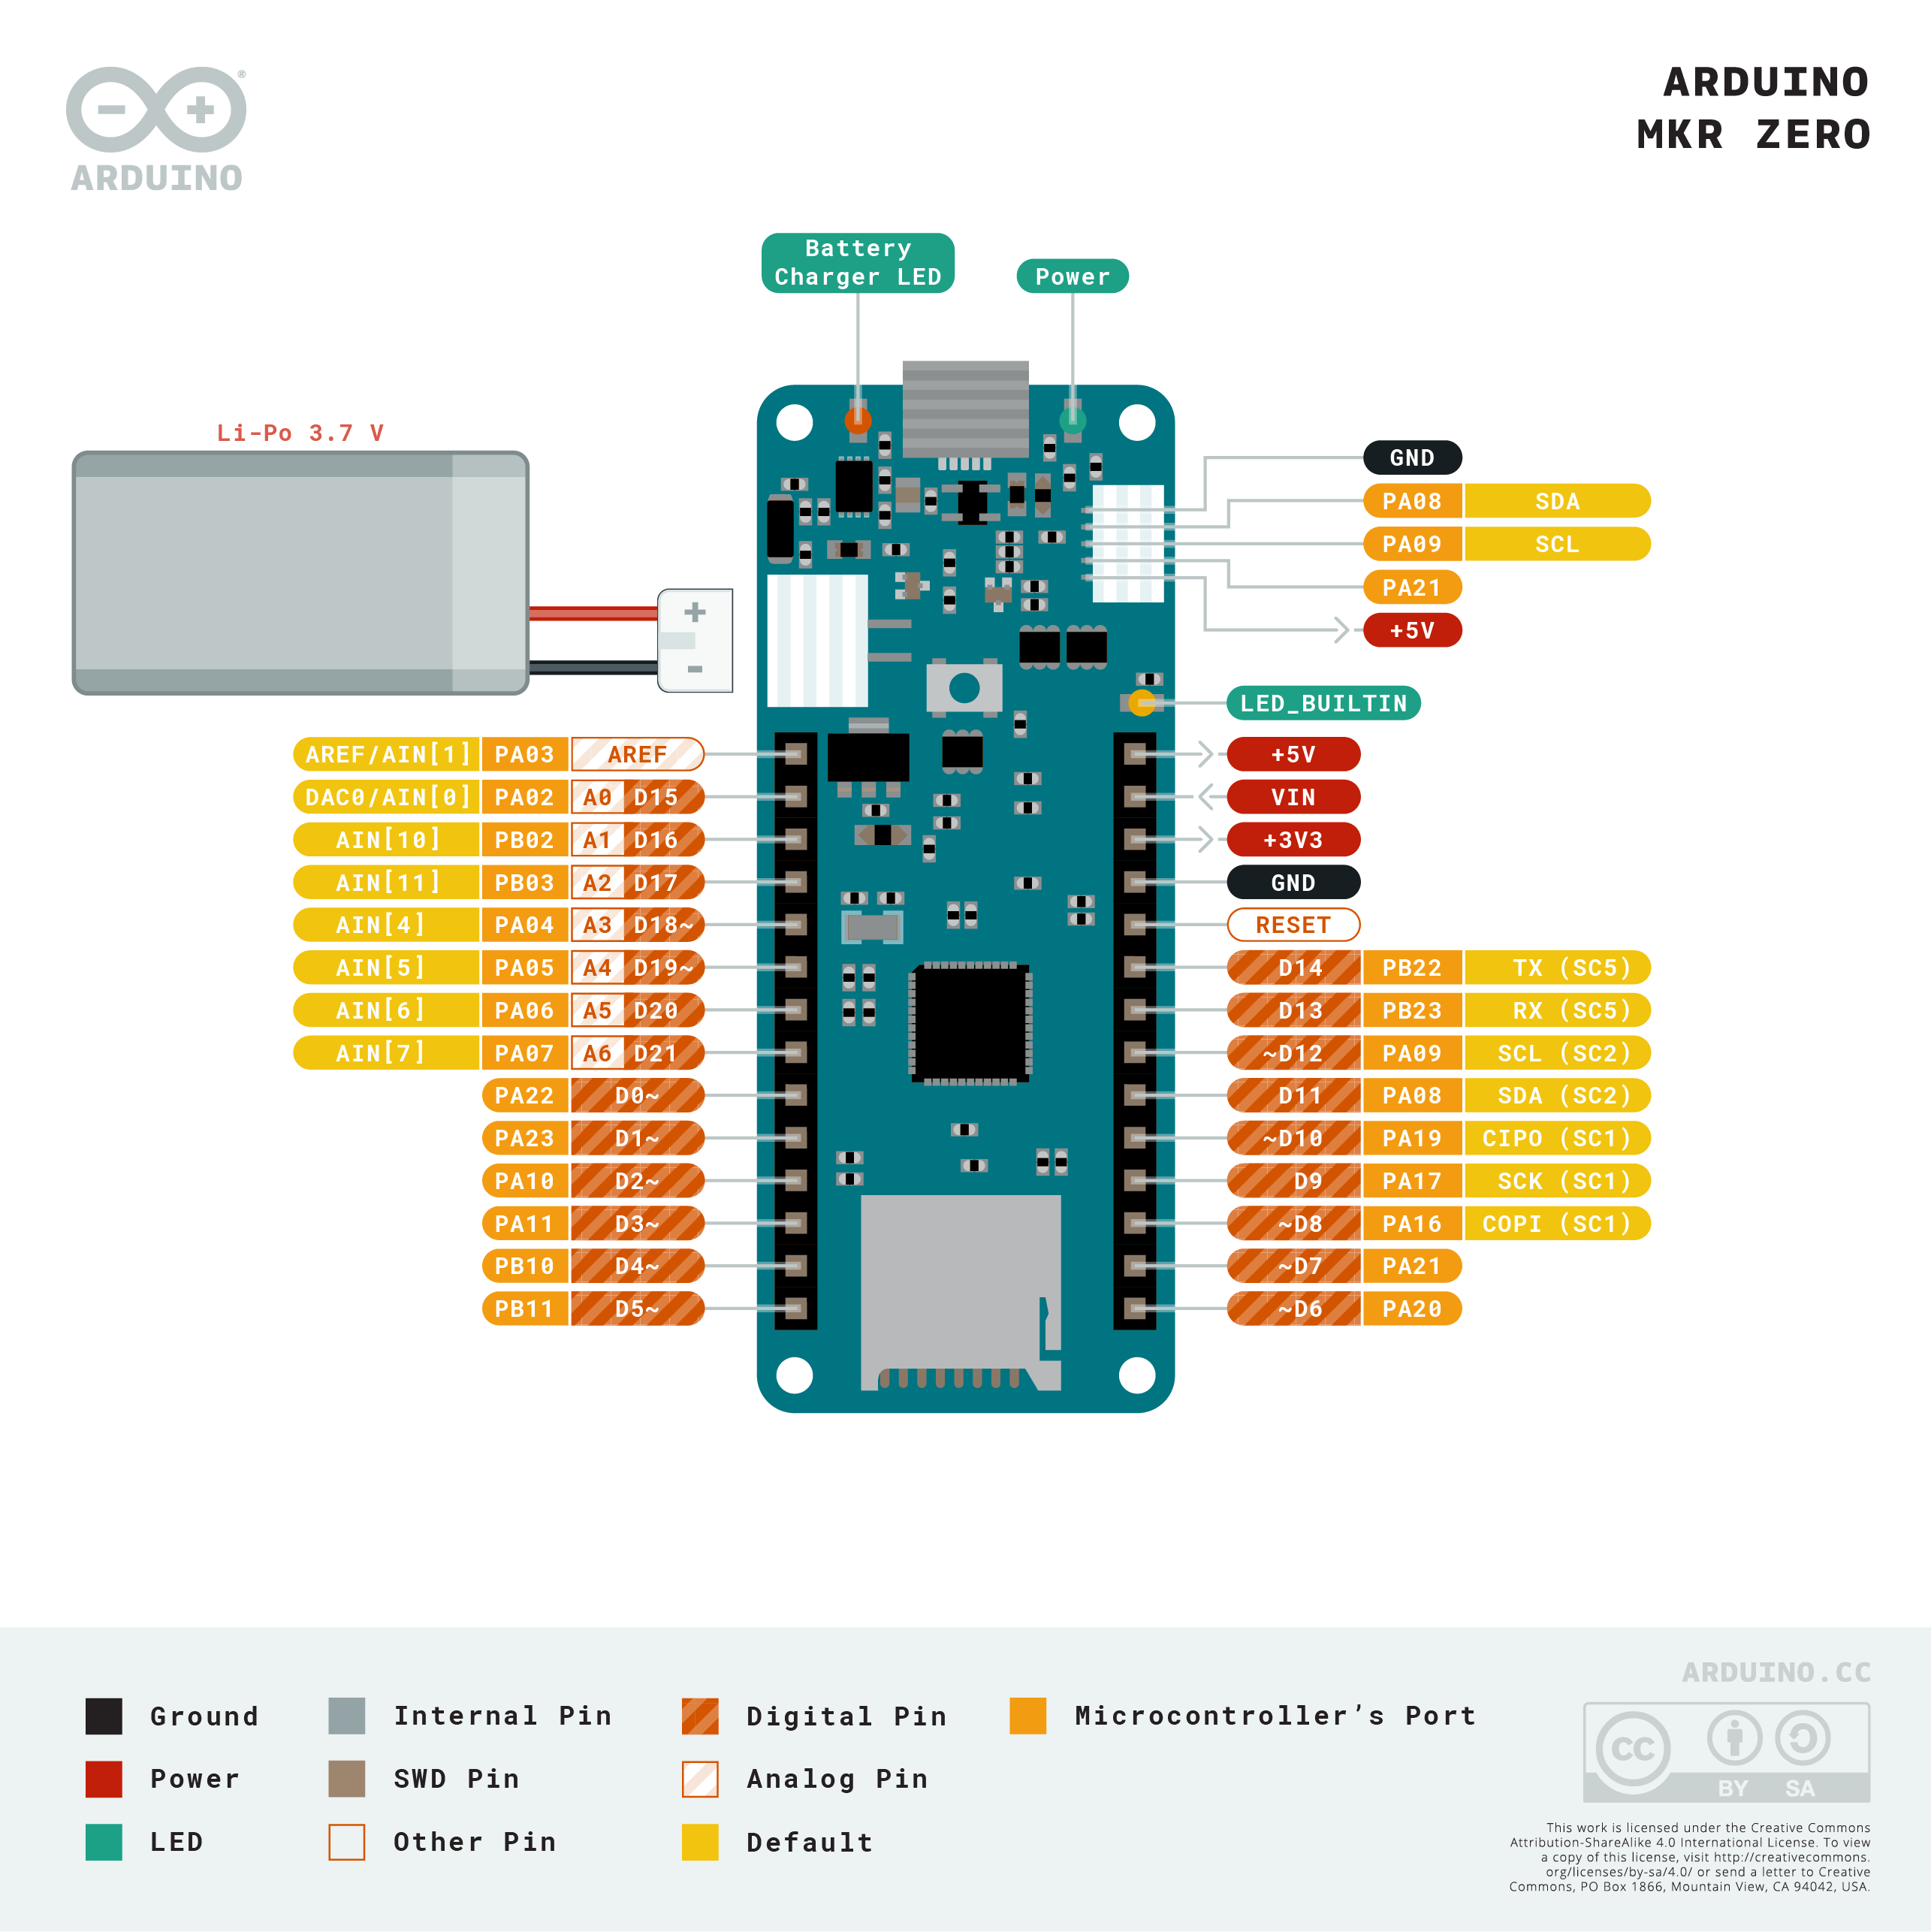
DAC & PWMs
4 PWM pins
they can be changed from default 8-bit to 12-bit resolution.
1 Digital-to-Analog Converter
10-bit (1024 values) by default, setting the resolution to 12 bits, one can use values between 0 and 4095 for analogWrite().
 analogWriteResolution(bits);
 analogWrite(pin,value);
video from ForceTronics - Arduino Zero DAC Overview and Waveform Generator Example
SWD pinout

Li-Po Battery
Use a Li-Po battery bigger than 700mAh
I2C

Connector: SHR-05V-S-B
It just provides 5V power!
To connect Adafruit's STEMMA boards or Sparkfun Qwiic boards (!if the run on 5V!) one needs an adapter like that one:
JST SH connector 5-pin (Arduino MKR) to 4-pin (STEMMA QT / Qwiic Cable)
More information one can find in Ben Everard article “Qwiic, STEMMA QT,
and Grove” HackSpace (Issue 38, 2020, p72)
Further Informations
Adapting Sketches to M0 & M4 by Lady Ada
Your Arduino SAMD21 ADC is wrong: did you notice? - omzlo.com
ATSAMD21g18 Bootloader With J-link Debugger
- instructable.com
License
This manuals is made by Wolfgang Spahn 2020.
Except where otherwise noted, content on this wiki is licensed under the following license: Creative Commons Attribution-NonCommercial-ShareAlike 4.0 International License.
