Table of Contents
Espressif ESP32
Serial to USB Driver
- SiLabs CP2104
- CH340
Espressif ESP32 Development Board
The HW-607 ESP32 Board with a CH340G Serial to USB chip.
ESP32 Development Board
https://dl.espressif.com/doc/esp-idf/latest/get-started/get-started-devkitc.html
Upload a Sketch
The Examples for the ESP32 become visible after selecting ESP32 DEV MODULE in the Arduino IDE.
Set the flashing speed to 460800 or lower (115200).
Upload your sketch.
It could be necessary to start the IDE with administrator rights, too.
Special Hardware Configuration
The I/O pins are not 5V-tolerant!
Use 3.3V instead.
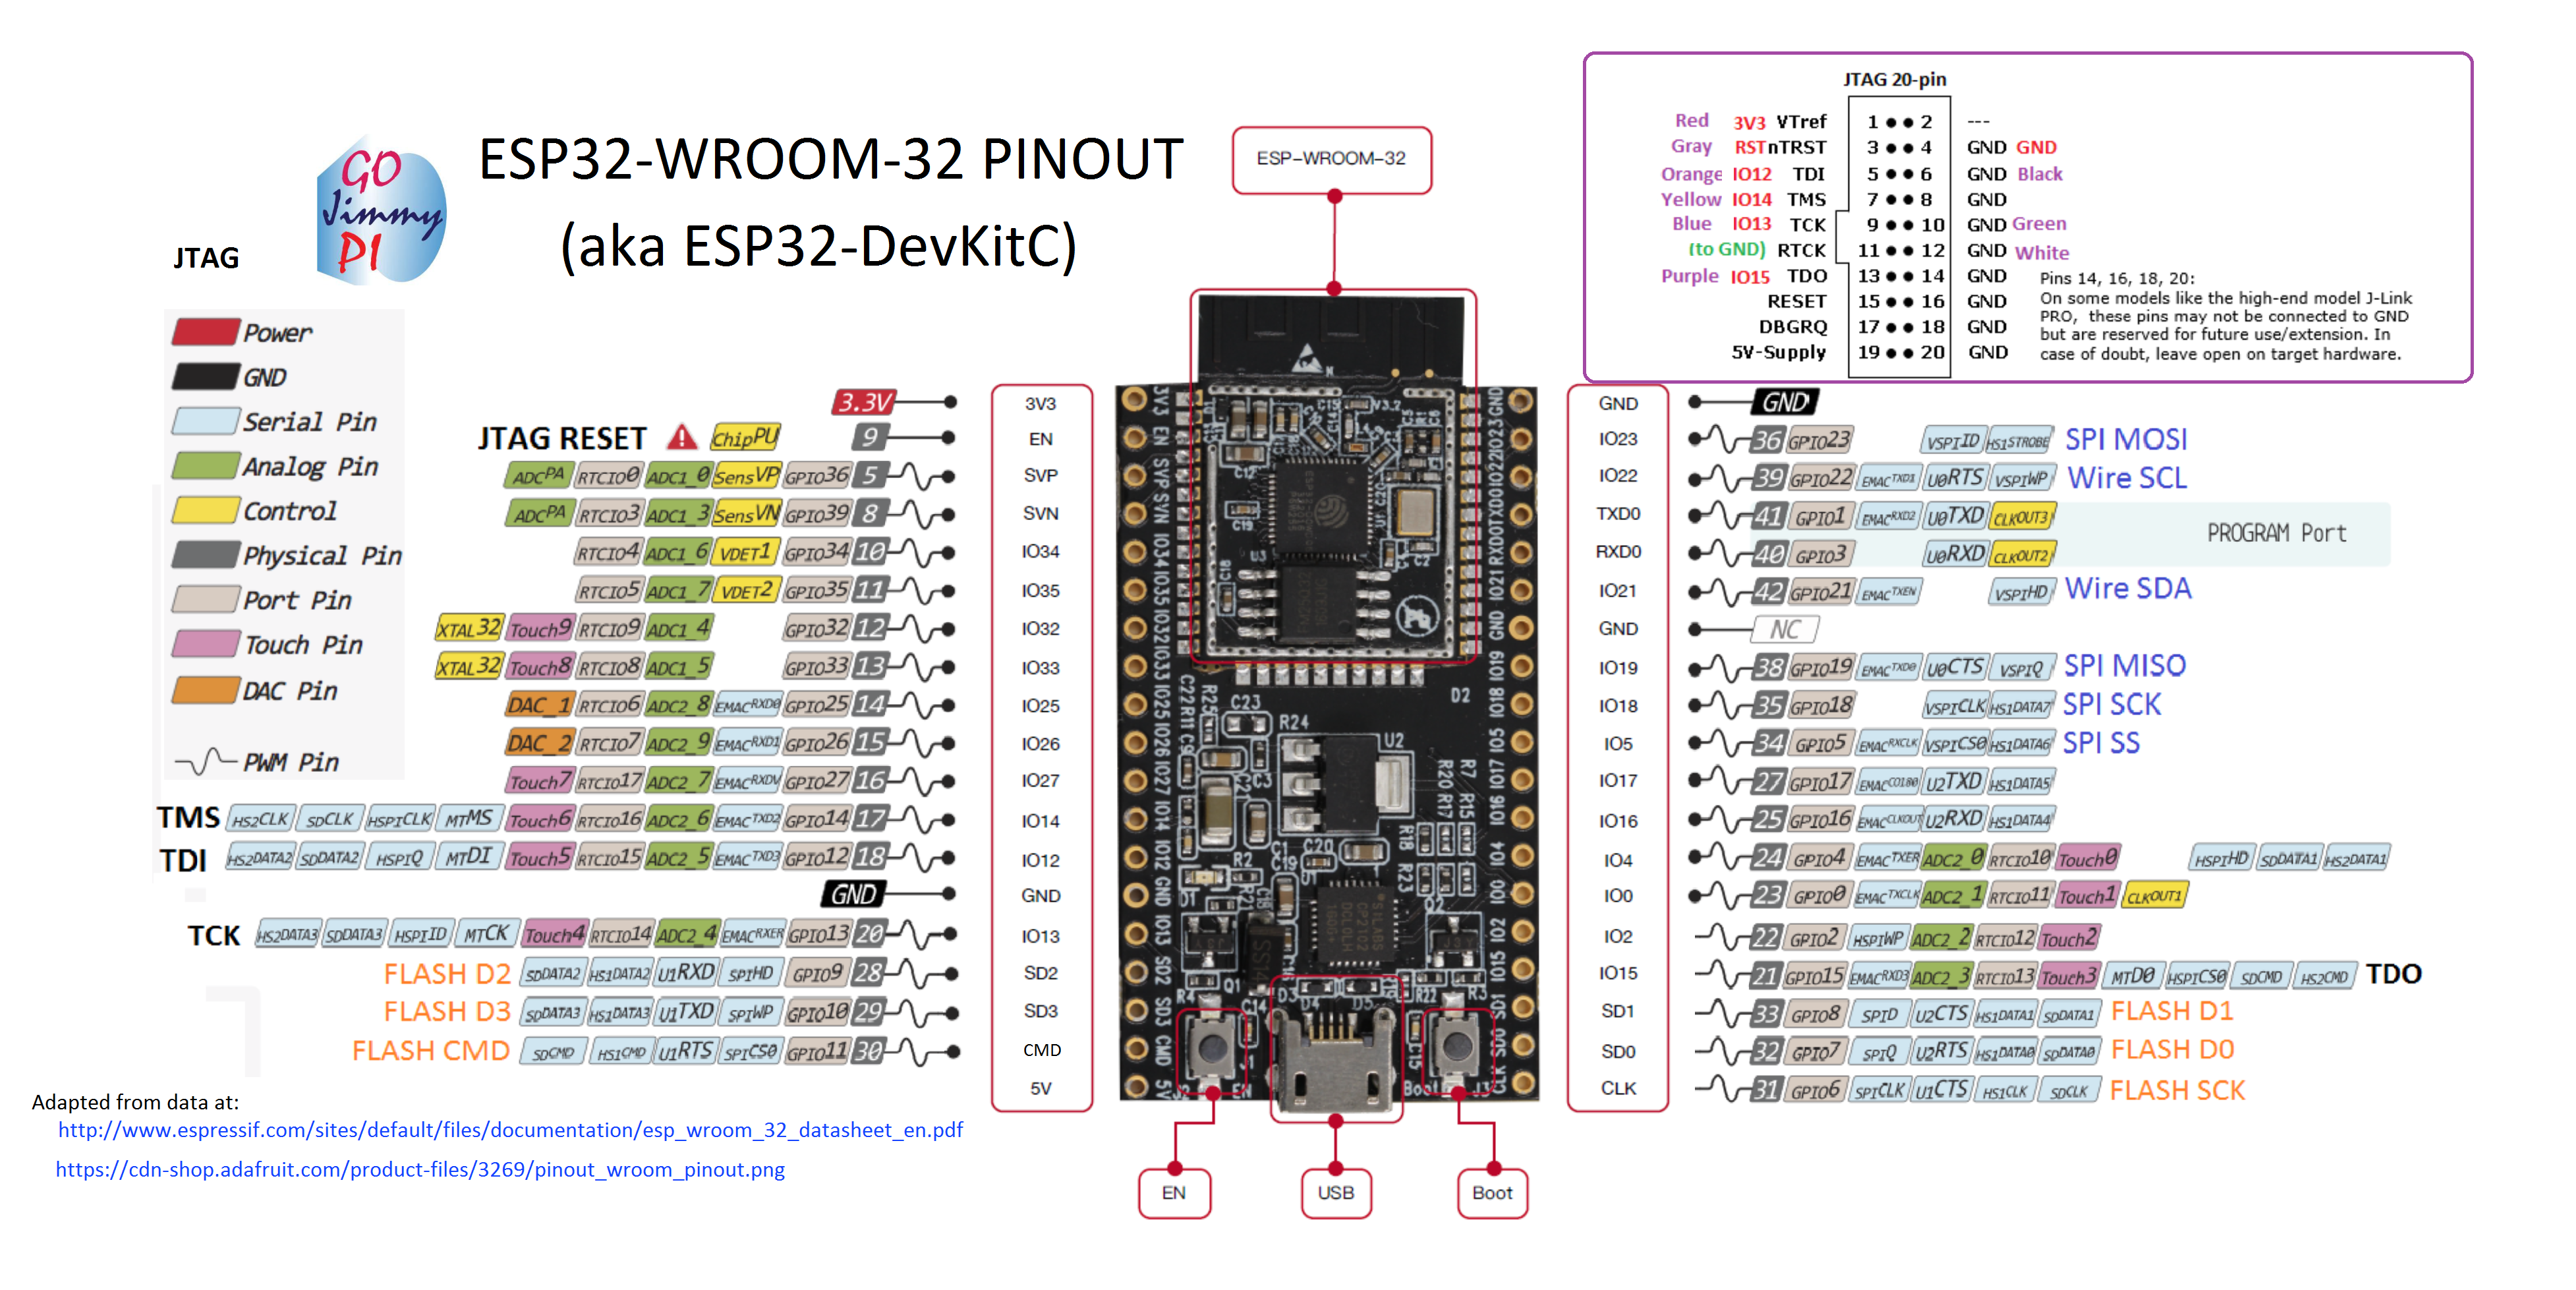
The build in LED is on GPIO 2.
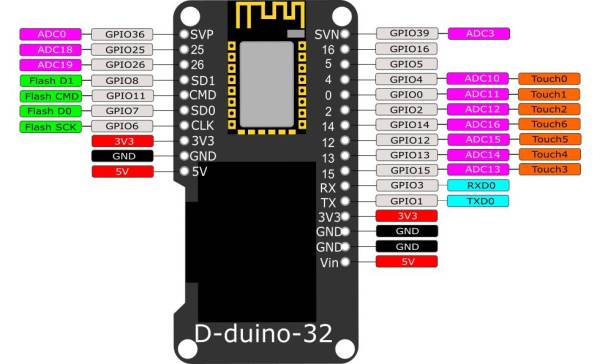
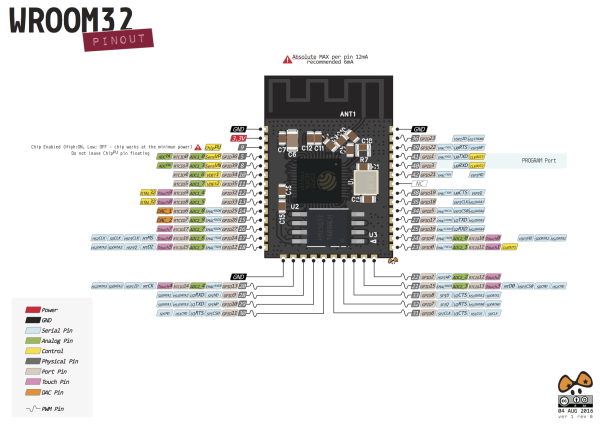
GPIO 34, 35, 36, 37, 38 and 39 are input only. And don't have a software pull-up or pull-down functions. One has to use an external 10k pull-up resistor.
GPIO 6, 7, 8, 9, 10 and 11 are used for the SPI flash chip and can't be used for any other purposes.
WeMos ESP32 OLED Board

The OLED is connected like that:
  pin5 - SDA
  pin4 - SCL
The I2C address of the screen is 0x3c.
  #include "SSD1306.h"
  SSD1306  display(0x3c, 5, 4);
Librarie:
https://github.com/squix78/esp8266-oled-ssd1306
Board: ESP32 Dev Module
Manuals:
http://www.instructables.com/id/ESP32-With-Integrated-OLED-WEMOSLolin-Getting-Star/
https://techtutorialsx.com/2017/12/02/esp32-arduino-interacting-with-a-ssd1306-oled-display/
Arduino core for ESP32 WiFi chip
https://github.com/espressif/arduino-esp32
Workaround for Arch Linux:
Install the latest Arduino IDE
sudo pacman -S arduino
Install Git
sudo pacman -S git
Download and run get-pip.py
 wget https://bootstrap.pypa.io/get-pip.py
 sudo python get-pip.py
Install PySerial
sudo pip install pyserial
Make a folder in the Arduino folder
 sudo mkdir -p /usr/share/arduino/hardware/espressif
 cd /usr/share/arduino/hardware/espressif
Download ESP32 and run get.py
 sudo git clone https://github.com/espressif/arduino-esp32.git esp32
 cd esp32
 sudo git submodule update --init --recursive
 cd tools
 sudo python2 get.py
Programming the ESP32
IO pin 34 and pin 35 don't work!
ESP-IDF Programming Guide
https://esp-idf.readthedocs.io/en/v2.0/index.html
the 8bit DAC:
https://esp-idf.readthedocs.io/en/v2.0/api/peripherals/dac.html
 #include <driver/dac.h>
 void setup() {
 }
void loop() {
 for (int i=0; i<255; i++){
 dac_out_voltage(DAC_CHANNEL_1, i);
 }
}
Output is a signal between 0 and 3.2V with 76Hz.
Adafruit HUZZAH32 – ESP32 Feather Board
DAC and ADC
ADC
 analogRead(GPIO);
 analogReadResolution(resolution) //set the sample bits and resolution in bits, 9 => (0 – 511) and 12 => (0 – 4095), default 12
 analogSetWidth(width) //set the sample bits and resolution
 analogSetCycles(cycles) //set the number of cycles per sample, range: 1 - 255, default 8
 analogSetSamples(samples) //set the number of samples in the range, default is 1 sample
 analogSetClockDiv(attenuation) //set the divider for the ADC clock, range: 1 - 255, default is 1
 analogSetAttenuation(attenuation) //sets the input attenuation for all ADC pins. Default is ADC_11db. Accepted values:
  ADC_0db: sets no attenuation (1V input = ADC reading of 1088).
  ADC_2_5db: sets an attenuation of 1.34 (1V input = ADC reading of 2086).
  ADC_6db: sets an attenuation of 1.5 (1V input = ADC reading of 2975).
  ADC_11db: sets an attenuation of 3.6 (1V input = ADC reading of 3959).
 analogSetPinAttenuation(pin, attenuation) //sets the input attenuation for the pin, default is ADC_11db
 adcAttachPin(pin) //attach a pin to ADC, returns TRUE or FALSE
 adcStart(pin) //starts an ADC conversion on attached pin’s bus
 adcBusy(pin) //check if conversion on the pin’s ADC bus is running, returns TRUE or FALSE
 adcEnd(pin) //get the result of the conversion: returns 16-bit integer
taken from: https://www.malabdali.com/esp32-adc-and-dac/
DAC
The ESP32 has two DAC pins, GPIO25 and GPIO26. The resolution is 8 bits.
dacWrite(25, Value); // 255=3.3V 128=1.65V 0=0.0V
For generating a sine wave one finds a good manual here: DAC’s on ESP32


